Using XAMPP Control Panel
By B Lingafelter testserver, workflow
- Open the XAMPP Control Panel. If you don't have a Desktop or Quick Launch icon, go to Start > All Programs > XAMPP > XAMPP Control Panel.
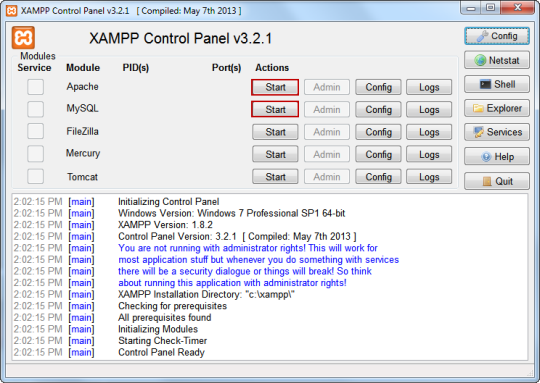
- Click Start button next to Apache. Note: Do NOT mark the Service check boxes on the far left. Running these modules as a service can cause conflicts with other applications or servers that use one or more of the same ports. Manually starting and stopping services is generally better when you don't need to run the Apache and MySQL components most of the time.
- The first time you start Apache or MySQL, Windows security will alert you to Allow Access (Unblock) the servers on your local network.
- In a few moments, you should see PID/Port information next to the module that's now running, and the Action button will now be labeled as Stop button. (Start/Stop is a toggle)
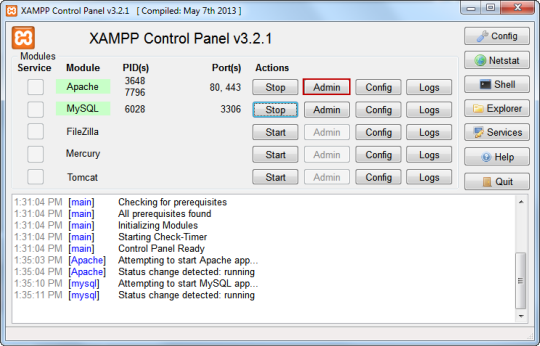
- If you will be working with a database, be sure to start MySQL also.
- Click red Close button in upper right. XAMPP will still be running in the background and can be accessed in the Notification area.
- To open XAMPP Control Panel when running in background, click Notification icon and double-click XAMPP icon.
Note: In this version of the Control Panel, you can now right-click the XAMPP icon in Notification area and start/stop components. - Apache/MySQL Module button Descriptions:
Apache Admin: Opens XAMPP for Windows Admin page in default browser; MySQL Admin: Opens PHPMyAdmin in default browser
Apache Config: Quick access to apache folders and configuration files, like httpd.conf and php.ini; MySQL Config: Quick access to mysql database folders
- Commonly used General button Descriptions:
Config: General Control Panel preferences (configure default editor and browser, set language, service, and port settings)
Netstat: TCP Listening Sockets
Shell: Do Not Use! Creates batch file to customize how xampp control panel functions
Explorer: Opens XAMPP system folder
Services: Opens Windows Services (for checking status of services)
Help: Link to XAMPP forum
Quit: Removes Control Panel from Notification area - To stop Apache or MySQL, click Stop button.
- To close the XAMPP Control Panel, click Quit button. XAMPP will be removed from Notification area.